Knitted: Doctor Who – Inspired Hat

INSULATE! Knitted Hat

After the train wreck that was my mug cozy, I felt like I needed to redeem myself as a knitter and I think I did, so I wanted to share this finished knitted object with you all.

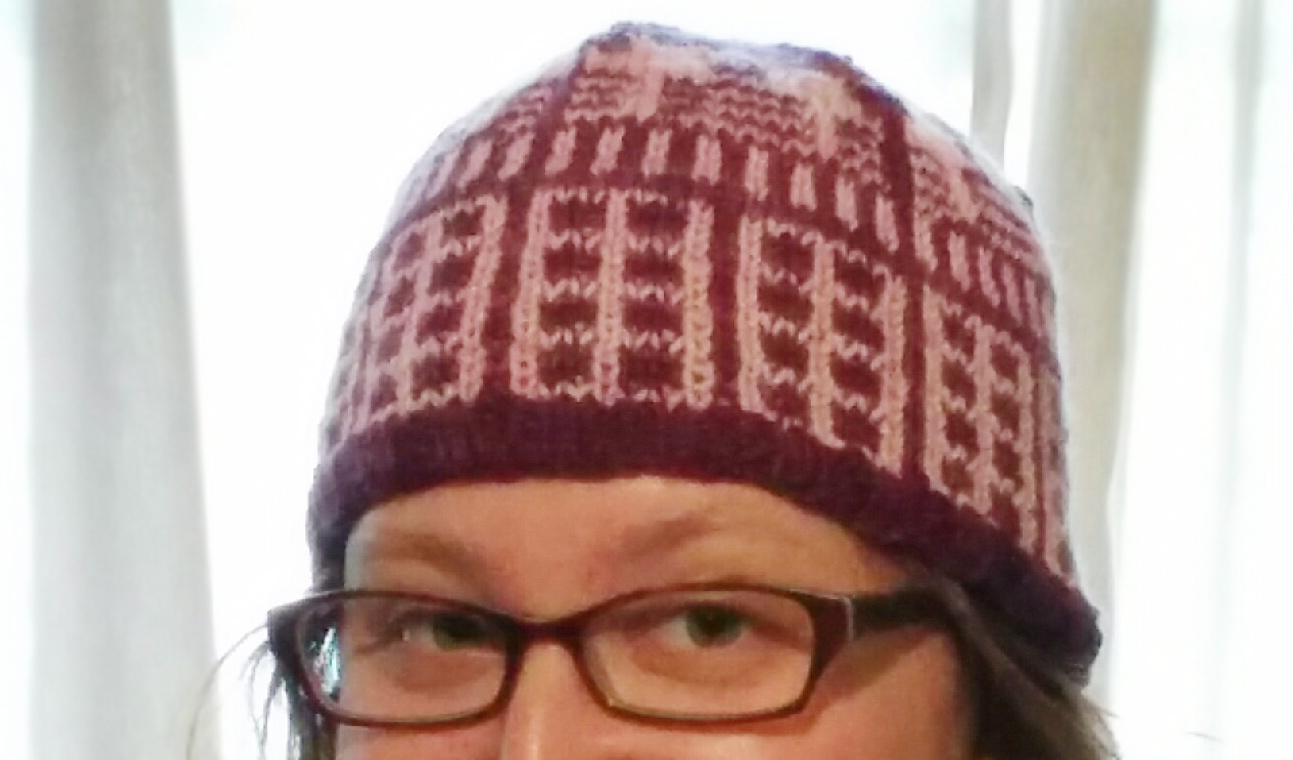
I found the INSULATE! hat pattern by Amy van de Laar on Ravelry a few weeks ago when looking for something to knit with two skeins of yarn John bought for me. It’s a 2-color hat, covered in Daleks, and the pattern is free!

Luminous in the May Day colorway, by Sincere Sheep
Polwarth Shimmer in the Plump colorway by Knitted Wit

I wasn’t sure about knitting pink and purple Daleks, so I held off on knitting the hat, hoping to find a more appropriate use for the yarn. But the urgent need for a pick-me-up knit trumped my color concerns and I decided to cast-on earlier this week.

I loved working with these yarns. They are both 85% Polwarth wool and 15% silk. The wool makes the yarn squishy and the silk makes the yarn soft(er). They’re both hand-dyed and had slight variations in color. (And in case you’re wondering, which you’re probably not, fiber-enthusiasts care to know what kind of sheep their wool comes from, which is why it is known that this wool is from Polwarth sheep.)

Whovian in a knitted Dalek hat
Dalek hat and a Doctor Who reference on my shirt (not planned, but I have so many Whovian shirts, it was bound to happen)

Oh, how I love to knit a hat. They’re so quick to knit up and this one only had 3 ends to weave in when I was done — quick finishing FTW.

If you enjoy stranded colorwork, I’d definitely recommend this pattern. Amy (the designer) gives very clear instructions on how to knit the hat and how to knit it without needlessly wasting too much yarn. Rows with minimal color changes actually just use slipped stitches from the previous row so you don’t have to carry the other color around the back. Pretty snazzy!

In other knitting news, I started knitting a shirtie today (that’s a shirt and a hoodie). This is my first non-accessory garment that I will be knitting. I’m nervous but excited at the same time. Will keep you all posted!

Adventures in Intarsia-land (Or the Difference Between Intarsia and Stranded Knitting)

I’ve done a bit more research on the color knitting techniques I should try out for my mug cozy and I’ve come to the conclusion that I need to learn intarsia knitting.

Before today, intarsia and stranded knitting were all the same to me. Now I know better…

When using the stranded knitting technique, the floating yarn on the inside of my mug cozy was unruly and out of control. To try and fix this, I looked for tips on stranded knitting and found that I could secure the float every few stitches to keep the wrong side of the stranded knitting from looking like a bowl of spaghetti. In that Knitty article that I’d found a few days ago, I failed to notice the “when to use intarsia vs color stranding” section, which suggests that if you have a pattern with blocks of color that span more than 5 stitches, you’ll probably want to use intarsia. Which I do.

Today, as I started yet another Google search for more suggestions on yarn management in colored knitting, I kept seeing “intarsia” pop up. I figured I should at least see what the deal was and when I started learning how to do intarsia knitting (not just looking at end-results), I realized that although intarsia may not make knitting my mug cozy easier, it will probably make a better end product.

Differences Between Intarsia and Stranded Color Knitting

  1. The presence (stranded) and absence (intarsia) of floating yarn behind the work. This is a big deal for my mug cozy, which would be a huge pain in the butt to get onto a mug due to the floats inside the cozy.
  2. If you’re not switching back and forth between colors every few stitches, you’re going to waste yarn with stranded knitting. Intarsia is good for big blocks of color and vertical stripes because the yarn is carried a short distance  up to the next row behind the work.
  3. Setting up for intarsia looks like a lot of fun (not). For every color change or block of color in a pattern, you will want to create a mini ball of yarn that hangs behind your work. With stranded color knitting, you would typically knit from the same ball of yarn the entire time for all colors.
  4. Each color block in intarsia knitting will need to be weaved in when you’re done. Unless you’re not using a color for a long while, you probably won’t have much to weave in as a result of stranded knitting.

References and Helpful Tips for Beginning Intarsia Knitting

  1. The Woolly Brew has a very beginner’s guide in 10 tips for intarsia knitting. I loved this article because it gave me a fairly good overview of how to get started. It also made me dread making all of those little bobbins…
  2. For a visual guide, a video from KnittingHelp on intarsia. A comment on their site also alluded to the difficult nature of intarsia knitting in the round (which is how I’m knitting my mug cozy).
  3. A video on intarsia knitting in the round from Planet Purl, which shows that to do intarsia in the round, you’ll need to purl every other row (eeewwwww). I suppose that’s better than not being able to put the mug cozy on a mug.
  4. Introduction to intarsia from Twist Collective. The author gives some tips at the bottom of the article, such as adding in detail once the knitting is complete using embroidery or duplicate stitch.

After learning these things, I’m still a bit hesitant to use intarsia for my mug cozy. There are some sections of my pattern that seem like they will be obnoxious to set up and the thought of purling even though I’m knitting in the round is not appealing. But the amount of yarn I would waste in using stranded knitting for this, especially in the sheep section, makes the annoyance of intarsia seem pretty worth it.

I will keep you posted on how this intarsia adventure goes! If you have any tips, let me know!